The QR code is the bridge between the physical world and your digital card: print it on paper business cards, stick it at your counter, project it on screen - anyone who scans lands on your page. This guide covers customizing it to look on-brand and scan reliably in print.
Where does the QR point?
By default, your QR code points to your card's public link: Nothing to configure. If you prefer, you can retarget it to any link (website, signup form, menu...) in the QR block's settings.
Customize the QR's look
In the editor, open the QR code block to change:
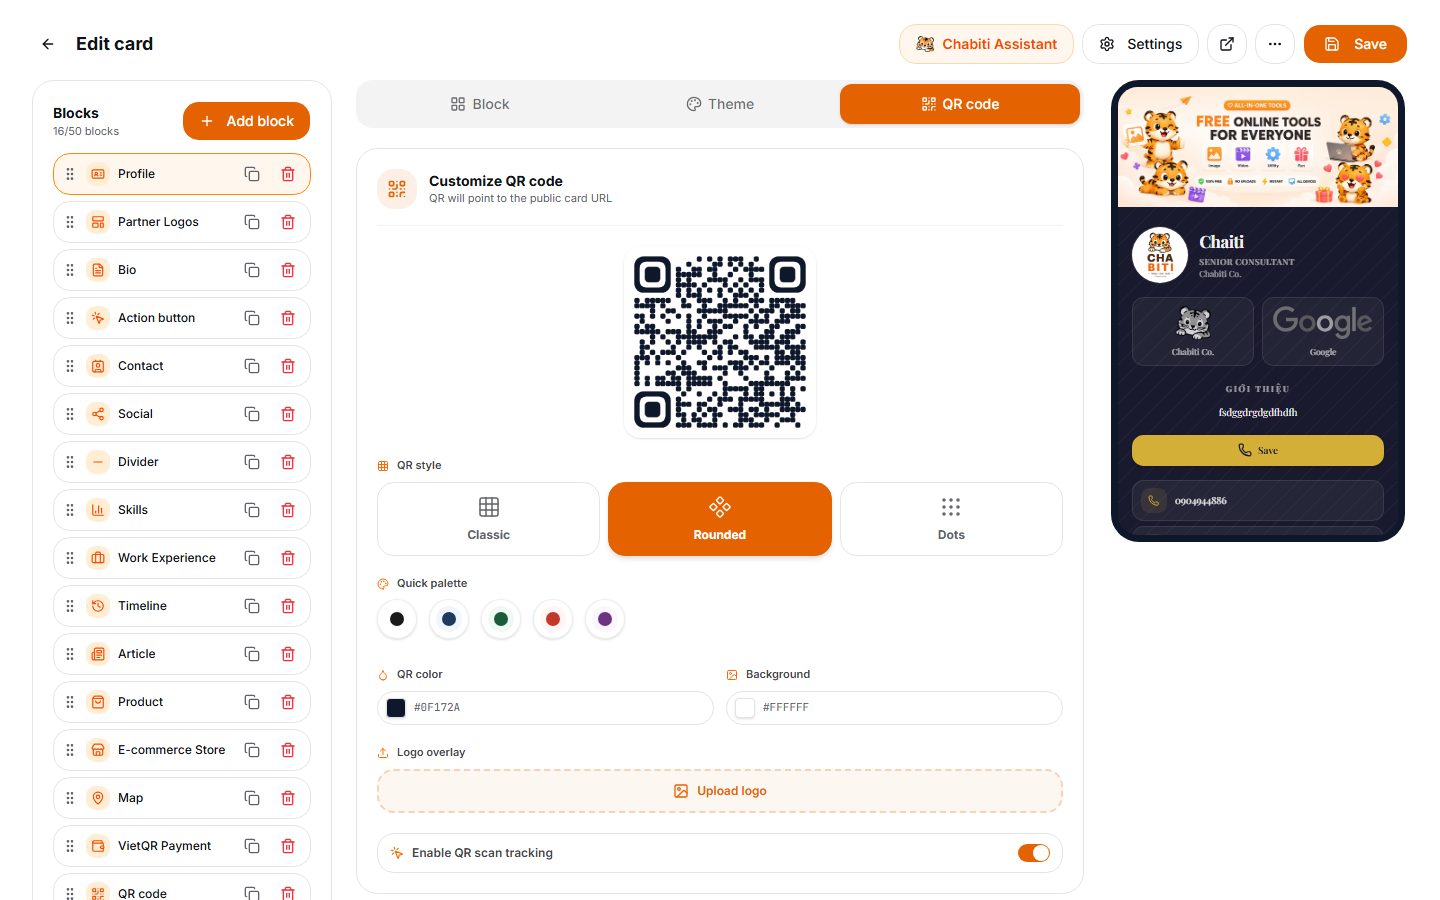
- Foreground color (the modules) and background color
- Style: 3 options: classic squares, soft rounded corners, or modern dots
- Center logo: Embed your brand logo in the middle of the code
Color safety rule: keep strong contrast between foreground and background (ideally: dark code on a light background). A pale yellow QR on white looks subtle but scanners genuinely struggle with it.
Download and print
- Click Download QR to save a high-quality image.
- When printing, keep a minimum size of 2×2 cm on paper cards; banners and posters should be 10×10 cm or larger.
- Always test-scan with 2–3 different phones before a large print run - especially if you changed colors or embedded a logo.
Where QR codes work best
- Paper business cards: On the back, with a line like "Scan for my full profile"
- Checkout counters and reception desks: Waiting customers have free hands
- The last slide of your presentation: Beats reading out a phone number
- Email signatures, packaging, delivery vehicles: Every touchpoint is a chance
Next up
QR sorted - now see every way to share your card and read its analytics to learn which channel performs best.